Pages
▼
Saturday, December 7, 2013
Gingerbread House Dough
There are two kinds of Gingerbread used for building houses - Regular edible dough and "Construction Grade" gingerbread. Regular dough is used for small to medium houses and for children's houses. It tastes like gingerbread cookies, but is a bit sturdier. It is easy to roll out and work with, and bakes up nice and brown due to the large amount of molasses in the dough. I usually use regular edible dough for everything but the largest of houses. It can be twice baked for extra sturdiness.
Construction grade gingerbread dough is technically edible, but you'd break a tooth if you tried to eat it. It is good for larger houses and competition houses because it is hard as a rock and resists humidity. (Competitions often necessitate building your structure many weeks or even months ahead, so the sturdier your dough the better.) It is a little tougher to work with, which is one of the trade-offs. Most construction grade gingerbread recipes contain much smaller amounts of molasses or use honey or corn syrup in its place. This results in a drier dough that is less brown in color. If you are building a large house or live in an area prone to humidity, try this recipe for Construction Grade Gingerbread dough from the fabulous website Gingerbread Exchange.
For a good edible gingerbread house dough, I highly recommend this recipe:
Tasty Edible Gingerbread dough:
This is a recipe that I modified only slightly from the Better Homes and Gardens "Cookies for Christmas" book (1985). This is a great overall cookie book, by the way.
5 cups all-purpose flour
2 teaspoons ground ginger
1 teaspoon cinnamon
1 teaspoon baking soda
1/2 teaspoon salt
(optional: 1/4 teaspoon ground cloves)
1 cup butter or margarine
1 cup sugar
1 cup molasses
1 egg
Mix dry ingredients together in a bowl, stirring to blend well.
In a separate bowl, cream butter and sugar with an electric mixer. Add the molasses and egg, then gradually add the dry ingredients. Chill dough for about an hour before rolling out.
Preheat oven to 325 degrees.
Roll dough about 1/4" thick and cut out using a pattern (you can buy a premade pattern online or make your own. Some stores even sell cookie cutters for the walls and roof.)
Bake on a foil or parchment-lined cookie sheet about 15 minutes until done.
Cool completely before assembling. For tips about assembling and decorating your house, see my post Gingerbread House Tips and Ideas
Saturday, November 16, 2013
Pecan Pie - A Southern Classic with Delightful Variations
Pecan Pie is one of my favorites and I love all the delicious varieties people come up with. The best thing about Pecan Pie is it is also wonderfully easy to make! These variations all start with one basic recipe:
Basic Pecan Pie
1 recipe Flaky Pie Crust (use bottom crust only; you can freeze the other half of the dough)
3 Eggs
1 Cup Sugar
1/2 teaspoon salt
2 Tablespoons melted butter
1 Cup Dark Karo Syrup
1 1/2 Cups chopped Pecans (you can use halves for a prettier look, but it slices neater with chopped nuts)
Preheat oven to 375 degrees.
Pat the pie dough into the pan and crimp the edges. Dust with a touch of flour to keep the bottom crust from getting soggy. Do not prebake the crust.
In a large bowl, mix the eggs, sugar, salt, butter and Karo syrup together. Add pecans and stir to coat. Pour into the pie shell and Bake 40-50 minutes until the center is set and not jiggly. Cool for an hour before slicing.
Maple Pecan Pie:
Replace the Karo syrup with an equal amount of real maple syrup. This is my favorite variation on pecan pie, and the one I make every year for Thanksgiving. YUM!
Bourbon Pecan Pie:
Add 1 Tablespoon Bourbon to the filling, and drizzle a touch of Bourbon on top of the pie when it comes out of the oven (not too much - you don't want to lose that carmelized crust and make it soggy!) The alcohol will evaporate with the heat, but the flavor will stay.
Spiced Pecan Pie:
Add 1/4 teaspoon each of Cardamom, Clove and Nutmeg into the filling as you are mixing.
Thursday, October 17, 2013
Cranberry Almond Coffee Cake
This tasty coffee cake is a great Brunch item - it is easy to make and stays moist when you make it the night before. For this coffee cake, I tweaked an old recipe from Bon Appetit. Once you have a good recipe for a basic sour cream coffee cake, you can easily change the flavor by changing just two ingredients - the cranberries and the almond extract. Just replace the cranberries with other chopped fruits or omit them altogether. Substitute other flavors for the Almond extract (Vanilla, Lemon or Anise would work well). There are endless variations!
1 1/2 Cups All-Purpose Flour
1 1/2 teaspoons Baking Powder
1/2 teaspoon Baking Soda
1/2 Cup (1 stick) Unsalted Butter, room temperature
1 1/2 Cups Sugar
3 Eggs
1 Cup Sour Cream
1 teaspoon Almond Extract
1 Cup Chopped fresh cranberries
(To use dried cranberries: soak them in hot water about 30 minutes to soften, then drain the water and pat dry)
Glaze:
1 Cup Confectioner's Sugar
1 Tablespoon Milk
1/2 teaspoon Almond extract
1/2 Cup chopped toasted Almonds (optional)
Preheat oven to 350 degrees. Grease and flour a standard-sized bundt pan.
Stir together the flour, baking powder and baking soda until well blended. Set aside.
Put the butter in a mixing bowl with the sugar and beat until fluffy. Add the eggs one at a time, beating until just combined. Add the sour cream and Almond extract, mixing on low until combined. Add the flour mixture gradually, mixing on low only until combined. Fold in the cranberries by hand.
Spoon the batter into the bundt pan and bake for 45-55 minutes. Test by inserting a cake tester or a toothpick into the center - it should come out clean. Let the coffee cake cool to room temperature before unmolding and topping with the glaze.
Glaze: In a small bowl, mix the confectioner's sugar with the milk and almond extract, stirring until the lumps are gone. Spoon it over the cooled cake, letting it drizzle down the sides. Sprinkle toasted almonds on top if you wish.
Enjoy!
Saturday, September 14, 2013
Baking with Apples
September is here and apple picking is in full swing! In my area, there are many orchards (and therefore many varieties of apples) to choose from, so I thought I would do a post about baking with apples.
There are a few basic things to remember when using apples for baking:
1) The best apples for eating raw are often NOT the best for baking: Macintosh turns to mush, Gala and Fuji become bland. And just forget about Red Delicious, they are absolutely horrid in baking. Golden Delicious can be good, but you have to be careful to get really firm ones.
2) Use different apples together: Combining two or three different apple varieties gives you a more interesting, complex flavor, especially in pies. Using only one kind of apple can make your pie have a "one note" flavor, and using a couple of different kinds lets you get the best of each apple - one might have a great flavor but lacks the firmness to stand up to baking, while another firm apple may not be as flavorful. Mix them together and it works perfectly.
3) Keep in mind the use: You may perfer a different type of apple for pies than what you would use for apple muffins or apple cake. In muffins, cakes and breads, I usually use just one type of apple, a firm-sweet or a firm-tart variety (like Cortland or Granny Smith). For sauce I tend to use whatever I have on hand, though I prefer Macintosh. For apple crisp, I use whatever I have on hand, since it doesn't need to hold its shape the way a pie does. For apple pies, I always like to use 2-3 types together.
4) There are endless varieties of apples, and selection will vary by region. While there are a handful of apples we all see in the grocery store (Granny Smith, Delicious, Macintosh, Gala, Fuji) there are numerous lesser known varietals which each region is known for. Because of this, it is hard to recommend apples that everyone will be able to find. There is an excellent book devoted to the subject of cooking with apples. The Apple Lover's Cookbook by Amy Traverso. This fantastic book goes into many of the rare and strictly regional varieties and how they are best used.
The orchard I go to every year, Breezeland's Orchards, has a very good Pick Your Own Apple Chart to help you determine which apples are good for what. They are located in Western Massachusetts, so some of the apple varieties listed are ones you might only find in New England. But there are many common varieties listed, so take a look.
5) It really comes down to your personal taste. Some of the apple types I like to use are listed as "good" but not "excellent" for baking, but I prefer them. Some people love the tartness of a pie made with all Granny Smith apples, while some people bake with Galas and think that's just fine. The best way to discover which apples you will like in desserts is to get baking! Yes, it is time-consuming to try out different apples, but it is a delicious experiment. Here are my local favorites, which are by no means the only good ones for baking, it is just my personal list:
Cortland - Firm, on the tart side but sweeter than Granny Smith
Jonathan - Medium firm, sweet
Jonagold - Medium firm, sweet
Ginger Gold - Medium firm, sweet with a hint of spice
Granny Smith - Very firm and very tart, assertive flavor, good for very tart desserts
Honey Crisp - Medium firm, sweet
6) Apples vary from year to year, and even orchard to orchard. Fresh is best, so get them from an orchard or farmer's market rather than the grocery store if you can. Not only will the apples be fresher there, it will give you more selection to experiment with. An apple fresh from the orchard will taste very different from the same variety of apple in the grocery store! I was surprised to realize how different they can taste. For example, the Cortlands I get in a store are usually sweeter, blander and not as juicy as the ones that are fresh picked from an orchard.
In the recipe section, I have recipes for pies, cakes and muffins using apples - take a look!
Enjoy!
Wednesday, September 11, 2013
10 Food Trends we LOVE to HATE
Huffington Post's food page recently posed the question, "What is the food trend you wish would just go away???" I was thrilled to see this question asked because, although I am a food blogger, I really hate food trends. I've never been a trend follower (if you know me, you know that I have absolutely no fashion sense). I'm more of a "classic-is-best" kind of gal, and that is my outlook on cooking as well.
So I did my own unofficial poll of friends and blog readers: What food trends do YOU wish would go away? Here are the top ten responses I got. Keep in mind that I really like most of these foods. I just get annoyed when one thing is saturating menus from upscale down to Mickey D's. Admittedly, food bloggers like myself bear some of the responsibility here, for coming up with ever-more-unique (okay, "weird") ways of presenting said ingredient. So here goes:
1) Kale - Kale is great and super-healthy, but we really should draw the line somewhere here. Kale does not belong in every single dish you make. And just how many different ways can you make Kale chips?
2) Quinoa - Yeah, you know who you are. Putting Quinoa in cookies is just wrong. Enough said.
3) Pumpkin Everything - I should tell you that I adore pumpkin, and I can even go for it in some less-than-mainstream ways. But this is another place where a line must be drawn. Pumpkin is going in places it should never go and we must stop it before it takes over like Godzilla. Do we really need pumpkin M&Ms?!
4) Cupcake Shops - I have a whole post dedicated to this subject. I love cupcakes, but the trend of cupcake-only shops has really run its course. For some reason it is refusing to die a respectful death.
5) Bacon, Bacon, Bacon - Even bacon lovers are getting tired of seeing candied bacon, chocolate-covered bacon, and bacon ice cream. The shock value has worn off, and the coolness factor will soon wear off as well.
6) Poke Cakes - This is another one of those trends that returns from time to time because it is easy and gives an interesting effect. I want to know who was the first baker who decided to poke holes in a perfectly good cake and pour Jello in there? We need to hold that person accountable.
7) Gluten-free - Before you get out the pitch forks, let me say that there ARE people who truly need to eat a gluten-free diet. Those people should be able to find options that fit their diet, I'm not making light of it. But let's also admit that there is a certain percentage of the gluten-free craze that is merely a fad. If I had celiac disease and truly needed to eat gluten-free, I would be annoyed with all these people co-opting my condition and making it just another food trend.
8) Vegan - Again, there are people who want or need to be vegan and have good reasons for it. Some of those people are among my friends and family. But this is another one that people like to "try on" because it is the in thing. True vegans probably have to roll their eyes many times a day at all the wanna-bes that surround them.
9) Flourless cakes and "molten" cakes. I'm probably the only person in the world that just doesn't go for these. I'm okay with that.
10) "Deconstructed" - I don't have a problem with the food, but I hate this term. If you are taking apart a classic recipe and presenting it in a new and bold way, why not come up with a new and bold name for it?
Tuesday, August 27, 2013
Individual Banana Puddings with Vanilla Wafer Crust
Banana Pudding made with vanilla wafers is such a nostalgic American dessert. Individual puddings in little ramekins gives this dessert a nice presentation for company. This recipe makes about six servings (depending on how much filling you put in each one - you can make four thicker puddings if you prefer).
Crust:
1 1/2 Cups Crushed Vanilla Wafers
1/4 Cup butter, melted
Combine in a bowl until the consistency is like sand. Spoon a thin layer (about 2 Tablespoons) of the crumb mixture into the bottom of each ramekin and press firmly to flatten out. Chill until set (30+ minutes)
Filling:
2/3 cup sugar
1/2 cup all-purpose flour
1/2 tsp salt
1 2/3 Cups milk
2 egg yolks
1 banana
1 Tablespoon vanilla extract
In the top of a double boiler combine the sugar, flour, salt, and milk. Stir the mixture in the bowl while the water boils beneath it, cooking for about 12-14 minutes until the mixture thickens (stir it frequently). Remove from the heat. *The time it takes to thicken will depend on a few factors, such as how cold the milk is that you start with. Instead of paying close attention to the timer, look for the correct consistency instead. The filling should be almost at pudding consistency (as thick as apple sauce) before you take it off the heat.
In a separate bowl, beat the egg yolks. Take a small amount of the hot milk/flour mixture (about a tablespoon) and stir it into the eggs. Add another spoonful and stir it in (you are "tempering" the eggs so they don't cook and curdle). Now pour the egg mixture into the rest of the hot milk mix. Return it to the double boiler and cook until thickened some more (about 3-5 minutes) stirring constantly.Take it off the heat.
Cut the banana in half. Mash half of the banana in a small bowl. Add the mashed banana and vanilla extract to the filling mixture. Now place a layer of Saran wrap directly on top of the filling (to avoid getting a thickened skin on top). Put it in the fridge to cool.
The other half of the banana should be sliced into six "coins." A slice of banana can be placed into the bottom of each ramekin on top of the crust, so that when you bite into the pudding you get a bite of real banana.
When the filling has chilled, spoon a little into each ramekin (a layer about 1" thick). Top with whipped cream. Garnish them with banana slices or a Vanilla wafers on each one.
Thursday, August 22, 2013
Baking with Cast Iron
This post has to be a little tribute to my parents, who swear by cast iron cooking. My mother passed down to me two of her family's cast iron pans, one of which is now probably 100 years old! My dad taught me how to cook pancakes on a cast iron griddle, and like any modern home cook, I totally disregarded his "old-timey" advice for years. But finally I saw the error of my ways. Cooking a pancake (or anything, for that matter) on modern non-stick cookware literally pales in comparison. Now I am a firm believer in cast iron cooking, and I have been pleased to learn that cast iron is great for baking as well!
Skillet Cake (recipe in the recipe section)
Although you can cook and bake just about anything with cast iron, there is a sacred list of three things that absolutely MUST be cooked in cast iron, or they simply won't achieve their wonderful potential. Those three things are CORNBREAD, IRISH BREAD, and PANCAKES.
For cornbread, I like to heat the cast iron skillet while preheating the oven. Then I take it out, grease it, add the cornbread batter, and put it back in the oven. That gives the crust a little extra color and crispness, which I love in cornbread:
For Irish Bread, on the other hand, I do not preheat the skillet, I just lay the round bread dough in the room temperature skillet and bake it (see my recipe in the recipe section):
Granny Mahoney's Irish Bread
For pancakes, it is best to heat your griddle or skillet over low-medium heat for a good 15 minutes or so before dropping the pancakes on. This ensures nice and even heating. For my recipe and my Dad's fantastic pancake tips, see the recipe section.
Homemade Pancakes
For cakes and pies, follow the baking instructions on your recipe. You'll want to watch your time more closely, because things tend to bake a little more quickly in cast iron. I do not reduce the heat when baking in cast iron, although I have heard some bakers do. But I choose to bake cakes and pies in cast iron that are not as delicate. Hearty chocolate cakes and country-style fruit cobblers are great choices.
The great thing about Cast Iron Cookware is that it is pretty inexpensive and, if well-cared for, it can last a lifetime (or in the case of my pans, several generations!) The Lodge company has been making cast iron here in the U.S. since 1896, and they are the experts on cooking with and caring for your cast iron cookware. See the Lodge website for more info: Care for Cast Iron
Thursday, August 15, 2013
The Undying Cupcake Trend
A new cupcake shop just opened up in the mall near me, the third one in my area that sells just cupcakes. Wait a minute, didn't I read an article two years ago in which several noteworthy food writers proclaimed that, after a long run, the cupcake craze is on its way out? In Boston, there are currently EIGHT cupcake shops, and that is not counting the surrounding suburbs. The one that just opened is one of a well-known chain of shops which sells oversized cupcakes more sugary than they are flavorful.
Don't get me wrong, I do love cupcakes. What's not to love? They are cute and oh-so portable. Unlike a slice of cake, no plate and fork are necessary with a cupcake. I think the biggest draw of all is the nostalgia factor. Because they used to be considered a "kid food," cupcakes make us think back to childhood, with its long carefree summers, birthday parties, and those old days when we could eat sweets with no guilt whatsoever. So I get the appeal; I'm just baffled that there are SO many stores in SO many towns that JUST sell cupcakes. How long can this trend of cupcake-only cafes continue when it's been more than twelve years already?!
These specialty cupcakes are great, but they don't come cheap. A one-bite mini will set you back at least $1.50, and the regular ones are $3.00 and up, depending on whether you want basic or exotic flavors. The latest thing in the ongoing cupcake trend is putting wacky fillings into the cupcakes. Unusual cake flavors and unique toppers have become passé after all this time, so now the cupcakes are filled, and they are morphing into giganto sizes.
The bakery that is usually credited with starting the modern cupcake craze is Magnolia Bakery in New York City. Even before they were featured on Sex and the City, The Magnolia bakery was known for their cupcakes. When I lived in NYC I used to go there sometimes. The store is adorable, and so are the cupcakes. Basic Vanilla and Chocolate with a simple old-fashioned butter frosting tinted lightly in pastel shades. I love Magnolia Bakery, even though I always thought their cupcakes were a tad dry. And cupcakes were never their only offering. As the story goes, the cupcakes were actually a bit of an afterthought on the menu when the bakery was first opening.
The first time I saw a shop that sold ONLY cupcakes (also in NYC), I thought it was a very clever novelty idea. They offered many flavors beyond the standard chocolate and vanilla, which made it a neat experience. But then more and more cupcake shops popped up to cash in on the craze. Weird, funky, terribly overzealous cupcakes emerged. Along came something called "Cupcake Couture." People even started having cupcakes as their wedding cake. Years passed, I moved to Boston, and yet I am still seeing new cupcake shops open each year. Haven't we reached a saturation point by now? Maybe I am just tired of it more than the average person since I have been following this trend almost from the start. Or maybe I am baffled (and admittedly a tad envious) that someone could make a living selling nothing but cupcakes day in and day out. Don't the customers reach a point where they say, "Hmmm, maybe today I feel like a Croissant instead. Or a slice of pie. Oh wait, this bakery doesn't offer that."
I guess I am just one of those people that starts to like something less when it becomes really trendy. But I feel like this one really is getting old. Can't we just go back to loving cupcakes because they are tasty and nostalgic, not gobbling up fantastical cupcake creations because they are so "in"?
Wednesday, August 7, 2013
Simple Chocolate Layer Cake
My recipe for Simple Chocolate Layer Cake is something I modified from the Hershey's basic chocolate cake recipe. A reliable and fairly easy recipe, it is a great one to start with if you've never made a cake from scratch. If you grew up on box mix cakes and like that "in the middle" texture and flavor (chocolatey but not too rich, moist but not too dense) than this is the cake for you.
2 cups sugar
Heat oven to 350°F. Grease and flour two 9-inch round baking pans, or three 6-inch round pans.
Sift together the flour, sugar, cocoa powder, baking powder, baking soda and salt in large bowl.
In a separate bowl, beat the eggs lightly and then add in the milk, oil and vanilla.
Add the wet ingredients into the dry ingredients. With an electric mixer, beat on medium speed for two minutes. Stir in the coffee (batter will be thin). Pour batter into prepared pans. Bake 25-30 minutes until a toothpick inserted in center comes out clean, or until the surface springs back when pressed lighly with a fingertip. Cool 10 minutes; remove from pans to wire racks. Cool completely. Frost with chocolate or vanilla buttercream.
2 cups sugar
1-3/4 cups all-purpose flour
3/4 cup Cocoa Powder
1-1/2 teaspoons baking powder
1-1/2 teaspoons baking soda
1 teaspoon salt
2 eggs
3/4 cup milk
1/2 cup vegetable oil
1-1/2 teaspoons vanilla extract
3/4 cup hot fresh coffeeHeat oven to 350°F. Grease and flour two 9-inch round baking pans, or three 6-inch round pans.
Sift together the flour, sugar, cocoa powder, baking powder, baking soda and salt in large bowl.
In a separate bowl, beat the eggs lightly and then add in the milk, oil and vanilla.
Add the wet ingredients into the dry ingredients. With an electric mixer, beat on medium speed for two minutes. Stir in the coffee (batter will be thin). Pour batter into prepared pans. Bake 25-30 minutes until a toothpick inserted in center comes out clean, or until the surface springs back when pressed lighly with a fingertip. Cool 10 minutes; remove from pans to wire racks. Cool completely. Frost with chocolate or vanilla buttercream.
Tuesday, August 6, 2013
Pineapple Skillet Cake
This Pineapple Upside Down cake (or, as my Great-Grandmother used to call it, "Pineapple Downside-Up Cake") is made in a cast-iron skillet so the fruit gets extra brown and caramelized with the brown sugar. My family is big into cooking and baking with cast iron, and I was thrilled to see this cake recipe in a book my mother gave me of old recipes from my grandmother and great-grandmother. Baking with cast iron is making a big come back these days - there is even a recipe similar to this in The Cake Bible by Rose Levy Beranbaum. I'm sure it's a great recipe, but I haven't tried it yet because I am so hooked on this one. With pineapple juice in the batter, I can't imagine any other Pineapple Upside Down Cake being better! However, I did take one tip from The Cake Bible: I mix this cake with the reverse creaming method instead of the traditional way.
1 1/2 Cups All-purpose flour
1 1/2 Cups Sugar*
1 1/2 teaspoons Baking powder
1/2 teaspoon salt
1/2 Cup (1 stick) softened butter
1/2 Cup Pineapple juice
3 eggs, separated
1 teaspoon vanilla
Sauce:
1/4 Cup Butter
1/2 Cup Brown Sugar
1 large Can Pineapple slices (I used 8 slices) drained and patted dry
4 maraschino cherries, sliced in half to make 8 halves
Preheat oven to 350 degrees.
I make the sauce and line the skillet with the fruit before making the batter then pouring the batter over it. But both steps are fairly quick to do, so you can make the batter first if you'd prefer.
Sauce:
In a large cast iron skillet, melt the butter. Mix in the brown sugar and stir until it is all coated in butter and starts to foam. Remove from heat and spread out the brown sugar sauce to make sure it coats the whole bottom of the pan. Place pineapple slices in the bottom of the pan and put a cherry in the center of each pineapple, rounded side down.
Batter:
Place the flour, sugar, baking powder and salt in the bowl of an electric mixer. Beat on low for about 30 seconds to mix dry ingredients. Add the butter (in chunks) and the pineapple juice to the dry ingredients. Mix on low until moistened and then turn the mixer up to medium. Beat for 1 minute to aerate. Add egg yolks one at a time with the vanilla, beating just until each egg is incorporated. Scrape down the bowl.
In a separate bowl, beat the egg whites until stiff. Fold the egg whites gently into the rest of the batter (there will be white streaks).
Pour batter over the sauce and fruit, gently spooning it into all the areas of the pan. With a spatula, spread the batter to even it out, while gently pressing down to ensure it gets into the crevices of the fruit.
Bake at 350 for about 30 minutes, until a toothpick inserted in the center comes out clean. This cake turns very brown on the outside, so don't be alarmed.
When the cake is done, flip it onto a platter while hot - (Make sure to loosen the sides of the cake from the pan really well first. For this I like to use a heat-resistant spatula).
If any fruit sticks to the pan, carefully scrape it off and place it back on the cake.
Cool to room temp and cut with a hot knife.
*This cake is very sweet; I like it as is, but if you want to lessen the sugar to 1 cup, go ahead.
Wednesday, July 17, 2013
Mocha Icebox Cake
Icebox Cakes aren't the prettiest dessert in the world, but they are a great option when you don't want to turn your oven on. Icebox cakes all follow a pretty simple formula: Graham crackers, thin cookies or pre-made cake are layered with a pudding-type filling and whipped cream. The dessert is then left in the fridge for several hours to meld together. The filling softens the crackers into a cake-like consistency after several hours of refrigeration, and what you end up with is a cool refreshing "cake." The possibilities are limitless for flavor combinations, so experiment with different fillings.
Mocha Icebox Cake:
1 Box Graham Crackers (I used about 2/3 of the box)
Filling:
1 Cup Sugar
1/2 cup all-purpose flour
1 Tablespoon cocoa powder
1/2 tsp salt
1 Cup milk
1 teaspoon espresso powder
In the top of a double boiler combine the sugar, flour, cocoa, salt, and milk. Stir the mixture in the bowl while the water boils beneath it, cooking for about 10 minutes until the mixture thickens (stir it frequently). Remove from the heat. Stir in the espresso powder until dissolved. Let the mixture sit or chill it in the fridge until it is no longer hot (it can be lukewarm, just not hot).
Whipped Cream:
1 pint heavy cream
1/3 Cup sugar
1 teaspoon vanilla
The cream should be very cold before starting. (I even chill the mixing bowl and whisk in the freezer for about 20 minutes to keep everything very cold.) Pour the cream into the mixing bowl and beat with the whisk until thickened and soft peaks form. Add vanilla and gradually add sugar. Beat until mixture is very thick and stiff peaks can form. Put it back in the fridge until ready to use.
To assemble:
In an 8x8 pan, place one layer of Graham Crackers on the bottom. Spoon a thin layer of the mocha filling over the graham crackers until completely covered. Spoon a thin layer of whipped cream over the top. Begin again with the graham crackers, then a layer of mocha filling, then whipped cream. Repeat if you have more filling left (this will depend on how thick you've been filling your layers). End with graham crackers and whipped cream on top. Dust with a little cocoa powder for garnish.
Cover with plastic wrap and let sit in the fridge overnight, or at least 6 hours.
Icebox cakes rarely slice up all pretty, but that's okay! It will taste cool and delicious.
Monday, July 15, 2013
Baking with Fresh Summer Fruits
Summertime brings gardens and farmer's markets full of fresh local fruits. But how to use all those different kinds of fruits in baking? What are the different types of fruit out there and which is best for each recipe? Here's a primer on some widely available summer fruits:
Cherries:
There are many different types of cherries, but most of us will only see one of three varieties at our local store or farmer's market. Sweet cherries such as Ranier (which is gold and red in color) and Bing (dark red, shown above) are the most readily available everywhere. I prefer Ranier for eating raw and Bing for baking. Sweet cherries are delicious in baked goods. They are not the cherries used in a traditional tart cherry pie (see sour cherries below), but sweet cherries are more versatile, being great for baking and also for eating raw.
Sour (tart) cherries are harder to find and usually very pricey when you can find them fresh. The reason for this is because sour cherries are grown in fewer areas and are not as hardy as sweet cherries, so there is more crop loss and they do not ship as well. Sour cherries are small and bright red; the most common type is Montmorency. You may see these cherries for a brief time in July at specialty stores or farmer's markets, or even in upscale grocery stores, but some years they can be hard to find at all. Sour cherries are generally used for traditional cherry pie (which is meant to be tart) or similar tart baked goods. They are not good for eating raw. If you are really set on making a tart cherry pie and cannot find fresh sour cherries, you can buy them frozen online (though pricey to ship overnight). There is also a brand of sour cherries packed in water, Oregon brand, which is available in most stores in the canned fruit aisle.
To prep fresh cherries for baking:
After washing the fruit, you can use a cherry pitter to get the pits out, or just
cut them in half and pull out the pits. If you want to keep your cherries whole,
you will need a pitter.
Even with a pitter, I prefer to still cut them in half. I think it releases the juices better.
Here is a bowl of dark red Bing cherries, all prepped and ready to go.
Strawberries:
Strawberries are easy to prep and so versatile. You can use them in Strawberry bread, strawberry shortcake, strawberry muffins, puree strawberries to make a real strawberry cake with strawberry buttercream. Or how about strawberry pie or a strawberry icebox cake? The list is endless. There are many different types of strawberry plants, but unlike cherries, the berries that come from those plants are pretty much the same, and totally interchangeable in baking. The most important thing is to try to get the freshest ripest strawberries you can. I highly recommend going to the farmer's market instead of your local grocery store.
To prep strawberries for baking, all you need to do is wash them, pat them dry, hull them, and then cut them into uniform pieces (or leave them whole if they are small berries).
Strawberry Buttermilk Cake, Real Strawberry Cupcakes, Strawberry Shortcake
Blueberries:
Blueberries are one of my favorite summer fruits to bake with. Not only do they taste great, but they are versatile and SO easy to use. Just pick over the berries to make sure there are no stems or rotten berries in the bunch. Then wash them and pat them dry. Done! Now you are ready to make a pie, muffins, bread, skillet cake, cobbler, custard, pancakes or any number of other blueberry things.
Blueberry Custard Pie
Traditional Blueberry Pie
Raspberries and Blackberries:
Raspberry filled white cake with Raspberry Buttercream
Peaches:
I love peaches, but if I am honest here, I'll admit that my favorite way to eat them is raw. I prefer other fruits in my pies, cobblers and muffins. But for those who do like to bake with peaches, here is the low-down: Peaches are very easy to use in baking. Choose the ripest ones you can find (again, farm-fresh is best). Wash, peel, and slice the peaches, removing the pit. Slices should be uniform in size, (I cut them about 1/2" thick) so they bake evenly. Peaches are almost never pre-cooked before putting them into a pie or cobbler - just peel and slice them, add sugar and thickener according to the recipe, then fill and bake as instructed. You can also add raw cut peaches to breads, muffins, pancakes (cut very small) or make a peach puree to add to cakes.
Friday, July 5, 2013
Taste-testing Buttercreams
As a baker and sometimes cake decorator, I have many frosting recipes that I use depending on what the cake will be used for. Since there is a battle of opinion raging among bakers, pastry chefs, and cake decorators about which buttercreams are best, I wanted to have my own taste test with a group of "Average Joe" Americans. I had about twenty people at my house for the Fourth of July, so I pounced on this opportunity to make them all my guinea pigs. These are the (somewhat surprising) results of my *totally unscientific* taste test:
I offered three of the buttercreams that I use most often. I made them all with no color added, and only vanilla extract as flavoring, so tasters could concentrate on the buttercreams themselves.
Here's a little about each one and what I consider to be their pros and cons:
American Buttercream - a simple butter frosting made from creaming butter with confectioner's sugar and a little milk or other liquid. Vanilla is the common flavoring, but you can use any flavor with it. Some people think that "American Buttercream" is made with shortening instead of butter, but no, that is the stuff you see in grocery store cakes, and who really knows what to call that? American Buttercream is usually the frosting of choice for beginning bakers because it is so easy to make. Various versions of this are also used by many cake decorators because it withstands heat and humidity better than other frostings.
Pros: Easy for anyone to make, holds up well to a moderate amount of heat (can serve a cake outside on a hot day)
Cons: Very sugary, texture always has a bit of grittiness, even after beating it a long time. Sweetness cannot be reduced the way it can in other frostings, since the confectioner's sugar provides the body of this buttercream (although it can be offset somewhat by adding other flavors).
Swiss Meringue Buttercream - A very basic explanation of Meringue buttercreams is that they are made by mixing beaten egg whites with sugar and butter. Italian Meringue Buttercream and Swiss Meringue Buttercream differ in the method used to combine these ingredients, but the result is pretty much the same taste - a buttercream that is airy and light with a silky texture and a rich buttery taste. Usually preferred by Pastry Chefs, Swiss Meringue Buttercream is notoriously difficult to make but it's actually not that hard once you get the hang of it.
Pros: Sophisticated taste appeals to adult taste buds when many other types of frosting are too sweet; texture is nice and light while the flavor is rich and buttery
Cons: Can be kept at room temp but NOT in high heat, so cake decorators need to advise clients that the cake must be refrigerated or at least kept in a cool room (Sometimes this is not possible for every event). The flavor can be too sophisticated - kids often don't like meringue buttercreams.
Cooked Milk Buttercream - This is an old-fashioned frosting that, like seven-minute icing, is rarely used these days. It is made by making a slurry of flour and milk and then cooking this mixture until it thickens. You then add this mixture to a mixture of butter and superfine sugar, which has been creamed for several minutes. Whip until fluffy and what you end up with tastes like a combination of whipped cream and vanilla pudding. This is my personal favorite.
Pros: Sweet enough for kids while also appealing to adult palates. Creamy and light, not gritty
Cons: Does not pipe intricate decorations; does not hold up to high heat
**THE RESULTS**
American Buttercream:
The winner, overwhelmingly, was American Buttercream. I was surprised by this, but I suppose I shouldn't have been. A lot of Americans grew up with this kind of frosting made by their grandmas, so nostalgia factors in heavily here. Very famous bakeries have made their names in large part by cashing in on this nostalgia - It's on Magnolia Bakery's famous cupcakes, as well as Sprinkles cupcakes and countless others.
Surprisingly, some of the things I considered "cons" about this frosting were things that tasters liked. That slight grittiness and super-sweetness? The heavier texture? All considered good things by this crowd. What I considered "unsophisticated and child-like" were the very things that brought tasters back to their childhood. BUT it was not unanimous - Although one person said, "This is what frosting should taste like!" one other person said, "Tastes kind of like canned frosting."
Cooked Milk Buttercream:
Second place went to the frosting that had the best of both worlds: Sweet and creamy, light, but not too light. I actually expected this one to win, but then I am biased. I really love this one. Tasters did really like this one, though it was a bit more popular with adults than kids. Some comments were, "Creamy, Airy. Sweet but not too sweet." Unfortunately, this is not one that can really be used to decorate cakes with intricate decorations, so I only use it for cupcakes and simple layer cakes.
Swiss Meringue Buttercream:
I was really surprised this one didn't do better. I expected it to come in second or maybe even first. I hear so many raves about this frosting from online foodies, and celebrity pastry chefs are always singing the praises of it. I personally love it, but then I like all different kinds of frosting. Kids overwhelmingly pushed this one aside, while adults gave it mixed reviews. Most said it was TOO light and not sweet enough. A few of them said, "This one has no texture to it. Doesn't taste like much" But a couple of people really liked that it was so light, especially one taster who said she usually doesn't like frosting.
***********
I have to tell you a very puzzling thing about these results: People that had previously liked one kind of frosting (my husband) gave it disparaging remarks in a blind taste test when it was not on an actual cake. And one taster who previously stated that she did NOT like a particular frosting, actually chose it as her FIRST choice in the blind test. One frosting that two people said was "not sweet enough" two other people said was "too sweet." I think people's opinions were also based on which order they tasted the frostings in. If they tasted a really sweet one first, maybe the others seemed bland in comparison.
So apparently in my non-scientific poll, only one thing is clear: everyone has different tastes after all!
Here are links to the Buttercreams I used:
American Buttercream
Swiss Meringue Buttercream
Cooked Milk Buttercream
Monday, July 1, 2013
Independence Day Desserts!
Everyone likes to get festive for the Fourth of July! I live just outside of Boston, so revolutionary war history (and Independence day in particular), is a big deal in our area. My family always has a big party, so I thought I'd share some of my dessert ideas here, from the simple to the show-stopping. Click on the links for recipes:
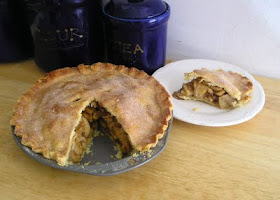
"As American As..." New England Apple Pie
Red Velvet Cake frosted with Sour Cream Frosting
"I cannot tell a lie" Cherry Pie
Old-Fashioned Rolled Sugar Cookies decorated with Royal Icing
Hidden Flag Cake - Next time I make this cake, I plan to make it a more accurate representation of the flag, with 13 stripes. Anyway, this was not difficult but it does require some precision and time. I can't take credit for the idea; other bloggers did it first. I got the idea from Cake Central
How to do it:
One recipe of my Moist White Cake can make all the layers you need here, or use any white cake.
1) Make three 8" pans of white cake dyed red (or red velvet cake).
2) Make one thick 6" layer of white cake dyed blue (fill the pan a little over halfway full) if you have them, use "bake even" strips for the blue to get a nice flat top.
3) Torte each red cake into three thin layers (Cut it horizontally - I use a ruler to measure where I am cutting - see my post on Leveling Cake Layers for how to torte a cake)
4) Make white buttercream frosting (this will be the white stripes).
5) Cut the dome off of your blue cake (if there is one) and measure how thick it is. This will tell you how many stripes you can stack your red and white before adding the blue.
6) After measuring how many stripes thick the blue field is going to be, (for example, 2 inches thick might equal 5 stripes), you can start assembling the cake.
7) Put down a red layer, frost it with white frosting, repeat. Go up a little more than halfway, or however far it is until you will be adding the blue.
8) Take your other red layers and stack them, frosting in between layers. Set this part of the cake aside.
9) Decide how big of a circle you want your blue cake to be and cut it with a cookie cutter (I think I used a 4" circle to cut mine out).
10) Cut a circle in the center of your assembled top striped layers. Put these layers on the cake. You should have a hole where the blue will go.
11) Add your blue to the center, gently pressing it into the rest of the cake.
12) Frost as you would like. When you cut it, each slice should look like the flag :)
Cake with edible fondant flag on top
Take your favorite cake and top it with an edible flag: Use white fondant rolled out and cut into a rectangle. Measure out lines for your 13 stripes with a ruler so they will be even, and mark lightly with a toothpick so you will know where to paint. Count down seven stripes from the top and mark a spot that is slightly more than 1/3 of the width - that is where your blue field of stars will go. Using gel food colors (available at craft stores or cake supply shops) paint the blue field and the red stripes directly onto the fondant with a fine tip brush. (Leave the white fondant bare for the white stripes) Add tiny dots of white Royal Icing to represent stars. Before the flag is dry, set it on your cake either flat or slightly waved. (Once it is dry it will not be pliable).
Monday, June 24, 2013
Coconut Cream Pie
If you love coconut, you will love this pie. It is almost a triple coconut pie - Coconut Milk and flaked coconut are in the filling, plus toasted coconut on top. Cool and creamy, this makes a delicious Summertime dessert.
Coconut Cream Pie:
For the crust, you can use a Flaky Pie Crust (as shown in the picture), but I usually prefer a Graham Cracker Crust for cream pies, because cracker crusts do not have to be baked like a flaky crust does. For coconut cream pie, you could use Vanilla wafers or Ritz crackers instead of Graham crackers if you'd like. Just remember to add more or less sugar depending on how sweet your crumbs are.
Filling:
1 cup sugar (or you can start with 3/4 cup and add more as you go - this pie is very sweet)
1/2 cup all-purpose flour
1/2 teaspoon salt
1 2/3 Cups (one 14oz can) Coconut milk (NOT coconut water or Crème de Coco - plain Coconut milk is usually in the international foods aisle of your grocery store, it is used in Asian recipes)
3 egg yolks
1/4 Cup flaked coconut, (plus a little more for garnishing later)
In the top of a double boiler combine the sugar, flour, salt, and coconut milk. Stir the mixture in the bowl while the water boils beneath it, cooking for about 12-14 minutes until the mixture thickens (In the first five minutes it doesn't seem to get thicker, but once it starts to thicken, it goes quickly. Make sure to stir it frequently and scrape the sides with a plastic spatula). Remove from the heat.
In a separate bowl, beat the egg yolks. Take a small amount of the hot milk/flour mixture (about a tablespoon) and stir it into the eggs. Add another spoonful and stir it in (you are "tempering" the eggs so they don't cook and curdle). Now pour the egg mixture into the rest of the hot milk mix. Return it to the double boiler and cook until thickened some more (about 3 more minutes) stirring constantly. Take it off the heat.
Now let it cool a bit. I place a layer of plastic wrap over the top to prevent the usual "pudding crust." You can stick the filling in the fridge or freezer to help it chill faster, just remember to take it out and stir it occasionally. When the filling has cooled, pour it into the pie shell. Then return it to the fridge to for another hour to make sure it is well-chilled before topping it with whipped cream. Keep it in the fridge when not serving.
Fresh Whipped Cream Topping:
1 pint heavy cream
1/4 - 1/2 cup confectioner's sugar, depending on how sweet you want it
Optional: 1 teaspoon Vanilla extract or 1/2 teaspoon coconut extract
Make sure the cream is well-chilled, (I even chill the mixing bowl and beaters when I make whipped cream). Beat the cream with a wire whisk (or electric mixer with the whisk attachment on high) until it is thicker and can form soft peaks. Add in the sugar and vanilla and continue to beat until very thick and can form stiff peaks. Spread it over the chilled pie and garnish with toasted coconut:
Spread 2 Tablespoons coconut flakes onto an ungreased cookie sheet and put in the oven at 350 degrees. Watch the coconut carefully, it only takes a few minutes to brown. You can choose how brown you want it. I usually only leave it in there for 5 minutes, stirring once halfway through.
Put the pie back in the fridge until serving.
Cut this with a very sharp knife dipped in hot water. Clean the knife with a towel between slices to keep it neat.
About Cream Pies
Cream Pies are wonderful in the Summer not only because they are cool and tasty to eat, but because you don't have to turn on your oven to make them! Some pie lovers don't consider cream pie a true pie, but I won't argue the technicalities - I'd rather just eat some pie.
At its most basic, cream pie is a thick, creamy filling (usually made with thickened milk) topped with whipped cream. There are endless varieties you can make with any basic recipe by adding different flavoring agents. My own cream pie recipe is adapted from an old edition of The Joy of Cooking, and I have made several different flavors based on the original. Here is my basic Cream Pie recipe, followed by some of the cream pie variations I have made (with links to the recipes).
Basic Cream Pie:
1 recipe Graham Cracker Crust, using whichever type of cookie or cracker will best fit your filling (you could use vanilla wafers, chocolate cookies, Ritz crackers, etc.)
Filling:
1 cup sugar (or you can start with 3/4 cup and add more as you go - this pie is very sweet)
1/2 cup all-purpose flour
1/2 teaspoon salt
1 2/3 Cups milk
3 egg yolks
2 teaspoons vanilla extract
In the top of a double boiler combine the sugar, flour, salt, and milk. Stir the mixture in the bowl while the water boils beneath it, cooking for about 10-12 minutes until the mixture thickens (In the first five minutes it doesn't seem to get thicker, but once it starts to thicken, it goes quickly. Make sure to stir it frequently and scrape the sides with a plastic spatula). Thickening time depends on how cold your milk is to start with. It can take up to 14 minutes to get nice and thick like a pudding. Once it is thickened, remove from the heat.
In a separate bowl, beat the egg yolks. Take a small amount of the hot milk/flour mixture (about a teaspoon at first) and stir it into the eggs. Add another spoonful and stir it in (you are "tempering" the eggs so they don't cook and curdle). After mixing in a few spoonfuls, pour the egg mixture into the rest of the hot milk mix. Return it to the double boiler and cook until thickened some more (about 3 more minutes) stirring constantly. Take it off the heat.
Stir in the vanilla extract to the filling mixture. Now let it cool a bit. I place a layer of plastic wrap over the top to prevent the usual "pudding crust." You can stick the filling in the fridge to help it chill faster. When the filling has cooled, pour it into the pie shell. Then return it to the fridge to for another hour to make sure it is well-chilled before topping it with whipped cream. Keep it in the fridge when not serving.
Fresh Whipped Cream Topping:
1 pint heavy cream
1/4 - 1/2 cup confectioner's sugar, depending on how sweet you want it
Optional: 1 teaspoon Vanilla extract
Make sure the cream is well-chilled, (I even chill the mixing bowl and beaters when I make whipped cream). Beat the cream by hand with a wire whisk, or use an electric mixer with the whisk attachment on high. When the cream is thicker and can form soft peaks, add in the sugar and vanilla. Continue to beat until it is very thick and can form stiff peaks. Spread it over the chilled pie.
Keep the pie back in the fridge until serving.
Cut this with a very sharp knife dipped in hot water. Clean the knife with a towel between slices to keep it neat.
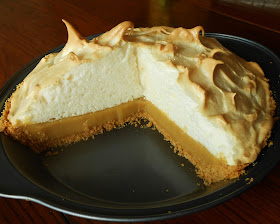
(Yes, this one has meringue in the picture, but it is the exact
same recipe I use for Butterscotch Cream Pie, I just
put whipped cream on top instead of meringue.)
Eggnog Pie (ugly picture, but super-tasty pie!)
Tuesday, June 18, 2013
Recipe Review - Alton Brown's Angel Food Cake
After making this recipe several times, I decided to write a review of Alton Brown's Angel Food Cake. Mainly because I wanted to put this cake on my blog but since it isn't my recipe I felt like I really needed to give credit where it is due.
Here is my review of Alton Brown's Angel Food Cake recipe: It is incredibly good, and you should make it. Done. Okay, I am just kidding. But really, that is it in a nutshell. This recipe has come out great every time I've made it. The cake is incredibly light and moist, delicate and slightly springy. The best part is that Alton Brown's recipe is very easy to follow for anyone who has never made an Angel Food Cake from scratch. Most of Alton Brown's recipes are like that - he spells it out for you as if you are making a particular food for the first time. Anyway, this cake is not only easy to make, but you can change up the flavor a bit by replacing the vanilla with a touch of orange or lemon extract. Serve it alone or topped with fresh berries and whipped cream.
There are three keys to success with any Angel Food cake: 1) After beating the egg whites, sift the dry ingredients over the beaten egg whites and fold in very gently, adding a little at a time. 2) Bake in an ungreased tube pan - this helps the cake "climb" the walls of the pan and gain height. 3) Cool the cake upside down. This is why tube pans have a long center support and sometimes have little "legs" on them. Angel food cakes and chiffon cakes should be cooled upside down to maintain the height and lightness while cooling.
So, on we go to this wonderful recipe. I thought the Food Network might not appreciate bloggers posting their recipes, so I am going to link back to the recipe on their site. Here you go:
Alton Brown Angel Food Cake Recipe